Orchard CMS Dev-Time Orchestration with ASP.NET Aspire
What is this Tutorial About?
ASP.NET Aspire is a real game-changer in the .NET ecosystem. It allows dev-time orchestrations of the components that you need for your application. These components (called resources) can be APIs, front-end applications, databases, containers, redis cache or any cloud component.
This tutorial presents how to use Aspire to dev-orchestrate a web app based on Orchard CMS. The orchestration involves:
- The app itself, which is a Razor Pages application. The CMS is configured using AutoSetup to install the default tenant that is based on the headless recipe.
- A MySQL database that will be used as the content database for the Orchard site.
- An Azure storage container that will be used as storage for Orchard shell and data protection.
The result is a decoupled web app that:
- Shows data that is stored in Orchard.
- Initial content and content types are created using data migrations.
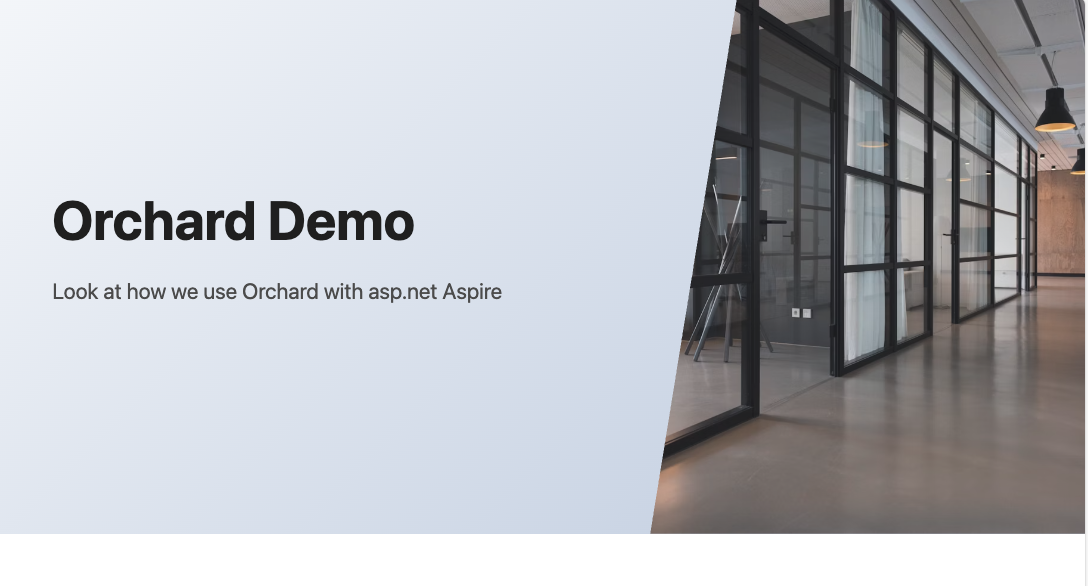
The result should look like the capture below. The text content is coming from Orchard.
What is Dev-Time Orchestration
Before diving into the implementation details, let's ask this question: what is dev-time orchestration?
To answer it, imagine that you develop a system where these components interact:
- A frontend calling a backend API to get and display data.
- The frontend fetches the data from a database and returns it to the client.
- The developer has to handle the communication between the components.
- The developer has to handle the access between the API and the database using connection strings.
During the old days, we would need to install the database, execute some scripts on it, and open two instances of Visual Studio and run them together: one for the APIs and the other for the frontend. We were doing our own orchestration.
Dev-time orchestration using Aspire changes the way this works. All the components (app, frontend, and database) are called resources. Aspire handles starting the resources, making the resources communicate with each other, and access each other.
Aspire also includes OpenTelemetry so you can have access to the logs and traces of the application in an extremely nice dashboard.
What to Expect from this Tutorial
Using Aspire, we will:
- Add the MySQL database as a resource.
- Add the Azure storage as a resource.
- Add the app to the orchestration.
- Pass the connection strings to the app.
- Pass the Orchard administrator password to the app
Implementation
The App Startup
The app is a standard Orchard CMS app. The startup is as follows:
using OrchardApp.Migrations;
using OrchardCore.Data.Migration;

var builder = WebApplication.CreateBuilder(args);

builder.AddServiceDefaults();

builder.Services
    .AddOrchardCms()
    .ConfigureServices(services =>
    {
        services.AddDataMigration<ImportMigration>();
    })
    .Configure((app, routes, sp) => { })
    .AddAzureShellsConfiguration()
    .AddSetupFeatures("OrchardCore.AutoSetup")
    .EnableFeature("OrchardCore.ContentTypes")
    .EnableFeature("OrchardCore.Contents")
    .EnableFeature("OrchardCore.DataProtection.Azure")
    .EnableFeature("OrchardCore.Recipes")
    .EnableFeature("OrchardCore.Recipes.Core");

var app = builder.Build();

if (!app.Environment.IsDevelopment())
{
    app.UseExceptionHandler("/Error");
    // The default HSTS value is 30 days. You may want to change this for production scenarios, see https://aka.ms/aspnetcore-hsts.
    app.UseHsts();
}

app.UseHttpsRedirection();
app.UseStaticFiles();

app.UseOrchardCore(_ =>
{
    // Serilog is creating issues
    // c.UseSerilogTenantNameLogging();
});

app.Run();
Let's break the code down:
This line:
builder.AddServiceDefaults();
indicates that we are adding the Aspire service defaults to our application.
services.AddDataMigration<ImportMigration>();
Here, we are using data migrations to create content and content types. For this demo, we create a type called HomeData that has a title part and a text field called SubTitle.
builder.Services
    .AddOrchardCms()
    .ConfigureServices(services =>
    {
        services.AddDataMigration<ImportMigration>();
    })
    .Configure((app, routes, sp) => { })
    .AddAzureShellsConfiguration()
    .AddSetupFeatures("OrchardCore.AutoSetup")
    .EnableFeature("OrchardCore.ContentTypes")
    .EnableFeature("OrchardCore.Contents")
    .EnableFeature("OrchardCore.DataProtection.Azure")
    .EnableFeature("OrchardCore.Recipes")
    .EnableFeature("OrchardCore.Recipes.Core");
Here, we are enabling the initial features that we need and most importantly shell and data protection on Azure (by default, Orchard stores this in the App_Data folder).
Consuming the Content
Nothing fancy here. We are consuming the Orchard content in a Razor page to show the hero content (see the capture). For this, we rely on this code:
@page

@using OrchardApp.Pages
@using OrchardCore
@using OrchardCore.ContentManagement
@using OrchardCore.Title.Models

@inject OrchardCore.IOrchardHelper Orchard

@{
    var data = await Orchard.GetRecentContentItemsByContentTypeAsync("HomeData", 1);
    var homeContentItem = data.First();
    var part = homeContentItem.As<TitlePart>();
    var title = part.Title;
    var subTitle = homeContentItem.As<HomeData>().SubTitle.Text;
}

@{
    Layout = null;
}

<!DOCTYPE html>
<html lang="en">
<head>
    <meta charset="UTF-8">
    <meta name="viewport" content="width=device-width, initial-scale=1.0">
    <title>Elegant Hero Component</title>
    <style>
    <!--hero style here -->
    </style>
</head>
<body>
    <section class="hero">
        <div class="hero-content">
            <h1 class="hero-title">@title</h1>
            <p class="hero-subtitle">@subTitle</p>
        </div>
    </section>
</body>
</html>
The App Configuration
The Orchard configuration is an important piece that defines the default tenant settings. It is as follows:
 "OrchardCore": {
    "OrchardCore_Shells_Azure": {
      "ContainerName": "shells"
    },
    "OrchardCore_DataProtection_Azure": {
      "ContainerName": "shells"
    },
    "OrchardCore_AutoSetup": {
      "AutoSetupPath": "",
      "Tenants": [
        {
          "ShellName": "Default",
          "SiteName": "Aspire Demo",
          "SiteTimeZone": "Europe/Amsterdam",
          "AdminUsername": "amine",
          "AdminEmail": "mostefaiamine@gmail.com",
          "AdminPassword": "[NOT SET]",
          "DatabaseProvider": "MySql",
          "DatabaseConnectionString": "[NOT SET]",
          "DatabaseTablePrefix": "",
          "RecipeName": "Headless"
        }
      ]
    }
  },
- We are using the same container
shellsfor tenant shell and data protection. - We are using MySQL as a database provider.
- Note that the database connection string is not set and that it is not using the standard connection strings section.
- Note that in the
OrchardCore_Shells_AzureandOrchardCore_DataProtection_Azuresections, the storage connection string is not set. - Note that the administrator password is not set.
Creating the Aspire Host
The Aspire Host is a separate ASP.NET application that handles the creation and orchestration of the different resources. A minimal host code is as follows:
var builder = DistributedApplication.CreateBuilder(args);

builder.Build().Run();
Adding the MySQL Database
In order to use MySQL with Aspire, we should use the Aspire.Hosting.MySql package. The code is as follows:
// the MySQL database
var mysql = builder.AddMySql("mysql", port: 3306)
    .WithLifetime(ContainerLifetime.Persistent);

var mysqldb = mysql.AddDatabase("ContentDb");
- We create the database server and use the 3306 port, which is the default port.
- We create the database
ContentDb, which will be used by Orchard.
Adding the Azure Storage
Aspire supports adding actual or emulated Azure storage. The following code adds the Azure storage using the Azurite emulator.
var storage = builder.AddAzureStorage("storage").RunAsEmulator(azurite =>
{
    azurite.WithLifetime(ContainerLifetime.Persistent);
    azurite.WithBlobPort(10000)
        .WithQueuePort(10001)
        .WithTablePort(10002);
});

var blobs = storage.AddBlobs("blobs");
var container = blobs.AddBlobContainer("shells");
- We are creating the Azure storage and using the default ports to allow the connection using Azure Storage Explorer.
- We are creating the blob service and a blob container named shells. This container will be used by Orchard for shells and data protection.
- We are using persistent lifetime for faster startup.
Adding the Orchard Admin Password
Let's have more fun with Orchard. We will ask Aspire to create a secret parameter called adminPassword and pass it to the app to be used for Orchard.
For this, we use this code:
// the admin password
var adminPassword = builder.AddParameter("admin-password", secret: true);
The value of the password is coming from the host configuration:
 "Parameters": {
    "admin-password": "P@ssword123"
  },
Adding the Application Resource
The final piece is to add the app itself. This is done by the following code:
builder.AddProject<OrchardApp>("App")
    .WithEnvironment("OrchardCore__OrchardCore_DataProtection_Azure__ConnectionString", blobs)
    .WithEnvironment("OrchardCore__OrchardCore_Shells_Azure__ConnectionString", blobs)
    .WithEnvironment("OrchardCore__OrchardCore_AutoSetup__Tenants__0__DatabaseConnectionString", mysqldb)
    .WithEnvironment("OrchardCore__OrchardCore_AutoSetup__Tenants__0__AdminPassword", adminPassword)
    .WaitFor(container)
    .WaitFor(mysqldb);
Let's break this down:
builder.AddProject<OrchardApp>("App")creates a resource calledApp..WithEnvironment("OrchardCore__OrchardCore_DataProtection_Azure__ConnectionString", blobs)is telling Aspire to pass the Azure storage connection string to Orchard to use for data protection..WithEnvironment("OrchardCore__OrchardCore_Shells_Azure__ConnectionString", blobs)is telling Aspire to pass the Azure storage connection string to Orchard to use for shells storage..WithEnvironment("OrchardCore__OrchardCore_AutoSetup__Tenants__0__DatabaseConnectionString", mysqldb)passes the MySQL database connection to Orchard..WithEnvironment("OrchardCore__OrchardCore_AutoSetup__Tenants__0__AdminPassword", adminPassword)passes the administrator password to Orchard..WaitFor(container)and.WaitFor(mysqldb)do not allow the application to start until the database and storage resources are started.
The Orchestrator Full Code
using Projects;

var builder = DistributedApplication.CreateBuilder(args);

// the MySQL database
var mysql = builder.AddMySql("mysql", port: 3306)
    .WithLifetime(ContainerLifetime.Persistent);

var mysqldb = mysql.AddDatabase("ContentDb");

// the Azure Storage emulator
var storage = builder.AddAzureStorage("storage").RunAsEmulator(azurite =>
{
    azurite.WithLifetime(ContainerLifetime.Persistent);
    azurite.WithBlobPort(10000)
        .WithQueuePort(10001)
        .WithTablePort(10002);
});

var blobs = storage.AddBlobs("blobs");
var container = blobs.AddBlobContainer("shells");

// the admin password
var adminPassword = builder.AddParameter("admin-password", secret: true);

builder.AddProject<OrchardApp>("App")
    .WithEnvironment("OrchardCore__OrchardCore_DataProtection_Azure__ConnectionString", blobs)
    .WithEnvironment("OrchardCore__OrchardCore_Shells_Azure__ConnectionString", blobs)
    .WithEnvironment("OrchardCore__OrchardCore_AutoSetup__Tenants__0__DatabaseConnectionString", mysqldb)
    .WithEnvironment("OrchardCore__OrchardCore_AutoSetup__Tenants__0__AdminPassword", adminPassword)
    .WaitFor(container)
    .WaitFor(mysqldb);

builder.Build().Run();
Running the Orchestrator
Now, let's run the host app and look at this beautiful dashboard:

Please play with the dashboard and see how the parameters are passed to the app through the environment variables.
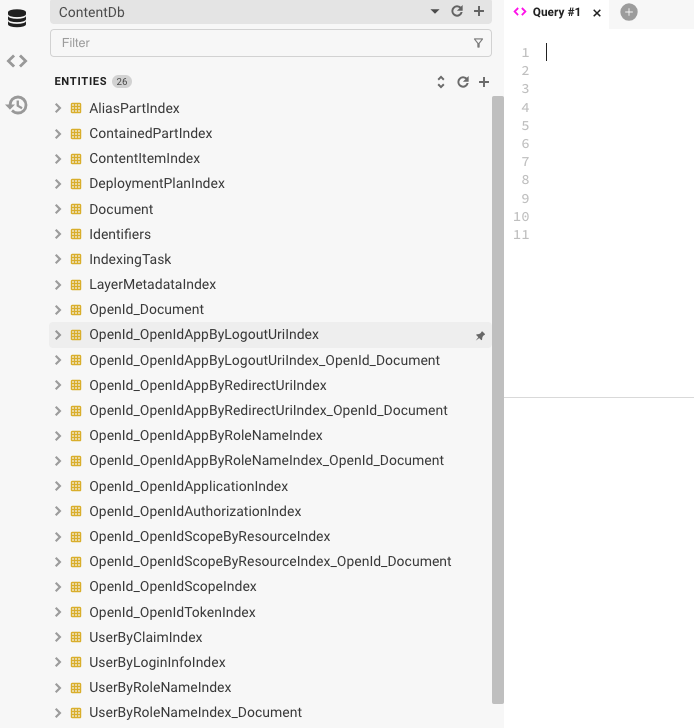
Accessing the Database and Storage
While the app is running, you can access the database and storage. For the database, we use the BeeKeeper Studio tool. Note that Aspire also has an extension to use PhpMyAdmin.
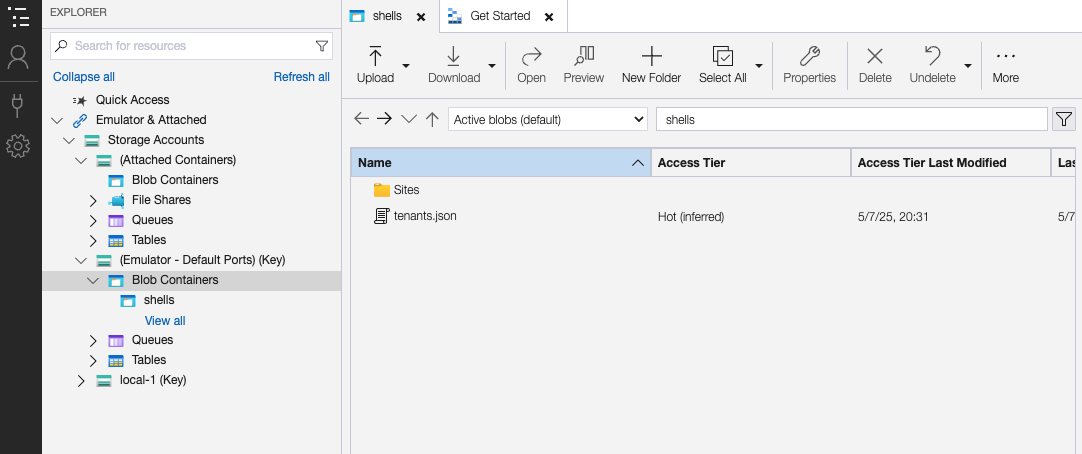
You can also check the tenant shell and data protection files using Azure Storage Explorer.
Persistent Containers
We used persistent containers for faster startup. You can also disable them to test certain features such as data migrations. You can also use volumes to persist the database into a file to retrieve data even after the containers restart.
Wrap-Up
We have shown how to leverage Aspire to have a very interesting Orchard CMS development experience. The full code is accessible here.