Authentication with Microsoft.Identity.Web
In this article, we will walk you through implementing authentication in blazor server apps that permis:
- Entra Id users to signin in to this application
- Call web APIs that are also secured also by Entra Id
Prerequisites
All we need is:
- Knowledge about authentication and authorization in ASP.NET Core apps
- An Azure subscription
- Two app registrations in Microsoft Entra Id, one for the backend and the other one for the frontend. For more information see this
Part 1 - Secure the Web Apis
Configuration
- Open the
appsettings.jsonfile in theWebApiproject and update theAzureAdsection with the values of the app registration created for the backend. ClientId is the identifier of your app registration while TenantId is the identifier for your tenant. You can also use common for TenantId.
  "AzureAd": {
    "Instance": "https://login.microsoftonline.com/",
    "ClientId": "[YOUR-APP-REGISTRATION-CLIENT-ID]",
    "TenantId": "[TENANT-ID-OR-common]",
  }
Configure the authentication
We should now configure the authentication for the web api.
- We should configure our services to use Identity-Web authentication. We do this as follows:
builder.Services.AddMicrosoftIdentityWebApiAuthentication(builder.Configuration); - Of course, we need our application to use the authentication middleware. We do this as follows:
app.UseAuthorization();
Protect the controllers
We should now protect our controllers. We do this by adding the [Authorize] attribute to the controllers or to the actions we want to protect.
Part 2 - Implement Authentication in the Web App
In this application, the frontend is implemented using Blazor Server.
Configuration
Blazor Server is still technically a backend technology. Therefore, the authentication configuration is quite similar:
 "AzureAd": {
    "Instance": "https://login.microsoftonline.com/",
    "TenantId": "[YOUR-TENANT-ID]",
    "ClientId": "[YOUR-CLIENT-ID]",
    "CallbackPath": "/signin-oidc",
    "SignedOutCallbackPath": "/signout-callback-oidc",
    "ClientSecret": "[YOUR-CLIENT-SECRET]",
  },
- TenantId is the identifier for your tenant.
- ClientId is the identifier of your app registration (frontend).
- ClientSecret is the secret of your app registration (frontend).
- The CallbackPath and SignedOutCallbackPath are the paths where the app will redirect the user after a successful sign-in and sign-out respectively. They should match the redirect URIs in the app registration.
Configure the authentication
Authentication in the Blazor app is configured as follows:
  builder.Services.AddMicrosoftIdentityWebAppAuthentication(builder.Configuration)
            .EnableTokenAcquisitionToCallDownstreamApi()
            .AddInMemoryTokenCaches();
AddMicrosoftIdentityWebAppAuthentication(builder.Configuration)configures the authentication using Identity.Web.EnableTokenAcquisitionToCallDownstreamApi()enables the token acquisition to call backend APIs.AddInMemoryTokenCaches()enable caching access tokens for better performance.
Mark blazor pages as authorized
Finally, you should mark the pages as authorized by applying the [Authorize] attribute to the pages you want to protect.
@attribute [Authorize]
Part 3 - Call the APIs
Implementation
Now, we need to call the APIs from the Blazor app. No big deal, we just do the usual stuff using HttpClient and Http client factory.
The ApiClient class below makes the necessary calls to the API.
public class ApiClient(HttpClient httpClient)
{
    public Task<HttpResponseMessage> Ping()
    {
        return httpClient.GetAsync($"/v1/ping");
    }

    public Task<HttpResponseMessage> GetProduct(string id)
    {
        return httpClient.GetAsync($"/v1/products/{id}");
    }
}
Then, we have to setup this class using the Http client factory as follows:
builder.Services.AddHttpClient<ApiClient>(c =>
                c.BaseAddress = new Uri(baseAddress));
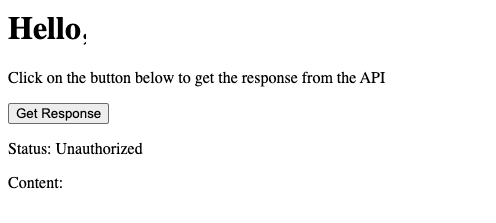
All set! But of course, when you call the APIs, you will get a 401.
Setting up authorization for the API calls
To fix this, we need to acquire a token before calling the API. We can do this by creating a delegating handler and injecting an instance of the ITokenAcquisition service.
However, we do not have to reinvent the wheel. We can use the out of the box identity user handler by calling AddMicrosoftIdentityUserAuthenticationHandler .
 builder.Services.AddHttpClient<ApiClient>(c =>
                c.BaseAddress = new Uri(baseAddress))
            .AddMicrosoftIdentityUserAuthenticationHandler("API",
                o => { o.Scopes = scopes; });
Fixing the consent issue
We are not there yet. We still have a consent issue. This is because the cached token still does not have the user information and likely, we will get the following error:
Microsoft.Identity.Web.MicrosoftIdentityWebChallengeUserException
with the message:
DW10502: An MsalUiRequiredException was thrown due to a challenge for the user
The fix is not straightforward as it requires user interactivity. The problem is described in detail in this article.
The first step is to enable consent handling in our blazor app as follows:
  builder.Services.AddRazorComponents()
            .AddInteractiveServerComponents()
            .AddMicrosoftIdentityConsentHandler();
Then we should catch the MicrosoftIdentityWebChallengeUserException and call the HandleException method.
try
{
     // Call the API
 }
 catch (Exception ex)
 {
      ConsentHandler.HandleException(ex);
 }
- This solution works but is not ideal. We should do it in every call which creates a lot of code duplication
- We cannot do this within a specific delegating handler as the HandleException requires user interaction and redirect to Microsoft pages
My solution is:
- Create a component
ConsentViewthat makes a single call to the API at the app startup. There we handle the consent exception and the subsequent calls would be successful. - Add the
ConsentViewto the central page. - Ensure that the call is made only once.
The ConsentView component is as follows:
@using Microsoft.Identity.Web
@using MyApiClient.Clients

@inject MicrosoftIdentityConsentAndConditionalAccessHandler ConsentHandler
@inject ApiClient Client;

@code {
    private static bool _consentAcquired;

    protected override async Task OnInitializedAsync()
    {
        if (_consentAcquired)
        {
            return;
        }

        try
        {
            await Client.Ping();
            _consentAcquired = true;
        }
        catch (Exception ex)
        {
            ConsentHandler.HandleException(ex);
        }
    }

}
The code sample can be found here: https://github.com/nubiquest-blogs/blazor-authentication